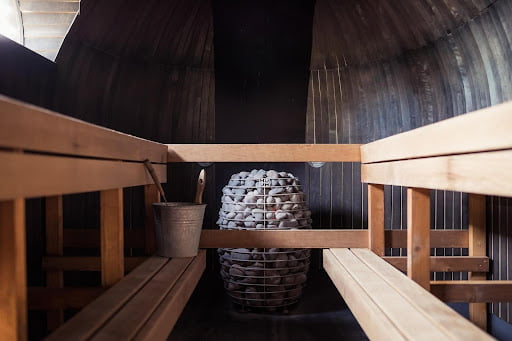
Embark on the ultimate self-care journey
The fast-paced life we lead often leaves us yearning for a breather. What if you could create your personal sanctuary right at home? A DIY sauna project could be just the ticket for ceaseless relaxation and enhanced well-being.

The Basics: What you’ll need
So, you’ve decided to bring the best outdoor barrel sauna experience to your backyard. Eager to start, right? In addition to timber like cedar or spruce, you’ll also need screws, nails, and other hardware for assembly.
For the heater, you’ll require an electrical connection or a flue exit for a wood-fired heater. You’ll need volcanic rocks that resist cracking due to rapid temperature changes, making them ideal for sauna use. You’ll also need a bench, crafted either from wood or some other heat-resistant material. For added comfort, invest in sauna-specific textiles like towels and headrests.
The devil is in the details; consider sealants to protect your wooden surfaces and some quality wood oil to enhance the natural fragrance of your timber.
Prepping the space
Before you delve into construction, assess the space you have. Dimensions between 4×6 to 8×12 feet are standard, but it ultimately depends on how grand your vision is. Obtain building permits if your municipality requires them. Conduct a land survey to make sure your intended area is free from utilities.
Clear the space of debris and level the ground if necessary. Lay the groundwork for electrical or gas lines. Plan for drainage if you’ll be incorporating a shower or steam feature. Finally, create a blueprint that includes your sauna’s dimensions and features.
Constructing the frame
Foundation first! You’ll need to lay concrete pads to secure your sauna structure. Use concrete anchors to hold the wooden frame. Start with the floor joists and move on to wall frames. Ensure you have measured twice so you only need to cut once. Install vertical studs at predetermined intervals, preferably 16 to 24 inches apart.
Accuracy is your friend here; ensuring that your frame is squared correctly will prevent issues when it’s time to fit the walls, ceiling, and benches.
Insulation and walls
Efficiency is the goal. Fiberglass insulation between the studs is just the start. Add foil vapor barriers on both walls and ceiling to effectively keep the heat. Seal the seams with foil tape to maximize heat retention. Cedarwood is ideal for the interior walls due to its natural resistance to moisture and its aromatic properties.
Consider tongue-and-groove boards for a more snug fit. For extra finesse, install the boards horizontally to give an elongated, spacious impression.
The heart of the sauna: The heater
The heater is your sauna’s soul. If you opt for an electric heater, make sure your electrical system can handle the load. Plan the electrical conduits before walling. For a wood-fired experience, you’ll need to build a chimney, ensuring it adheres to safety standards.
Make sure to install a protective barrier between the heater and your wooden surfaces to prevent accidental fires.
Seating arrangements
When it comes to benches, you have options. Two-tier benches offer a varied heat experience: the higher you sit, the hotter it gets. Softwoods are ideal for seating as they don’t get too hot. Sand down the edges to prevent splinters, and secure the benches to the wall studs, ensuring they are level.
Adding the extras
Upgrade your sauna with some modern features. LED lighting under the benches or in the ceiling can create a soothing atmosphere. Built-in speakers can offer auditory relaxation. Don’t forget to install a thermometer and hygrometer to monitor conditions. Make spaces for towel hooks and maybe a small table for refreshments.
Safety measures
Safety is paramount. The door should open outward and not be made of materials like glass that can heat up dangerously. Install handrails for ease of movement, and don’t forget a fire extinguisher and first aid kit nearby. Use heat-resistant materials in all construction elements to keep your sanctuary a safe haven.
