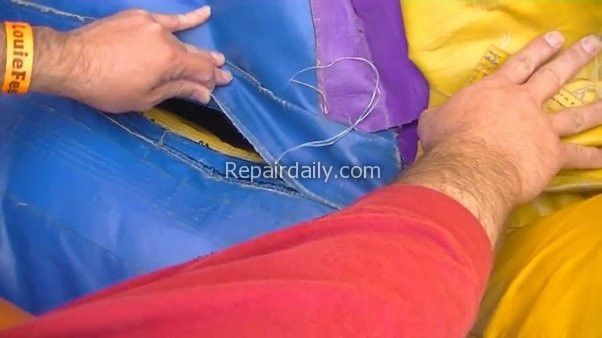

repairing bounce house
Though bounce house is made of heavy-duty nylon or polyester, after a certain period, it can cause a leak. Still, the good news is it can repair rather than throwing. But the problem most of the owners don’t know how to repair a bounce house. That’s why we are here.
So let’s check it out!
How to Find a Hole in the Fabric or Leak in a Seam
Following are the three easiest ways to find out a hole or leak in an inflatable bounce house.
- Listening for a leak
- Feeling around for a hole
- Using soap and water
Let’s briefly discuss
Listening for a leak
Hearing the sound of air leaking is a bit confusing since you may misguide by car driving sound or kids noise. So choose a super quiet place, fill up the bounce house, and then kill the power. You will find the major leak most easily. But for the minor leak, you might not be successful.
Feeling around for a hole
Thought Feeling around the sidewalls and the whole structure is boring, the method is effective. Applying the experiment in an area like a garage or basement will be ideal. Besides, ensure that you have shut down the door.
Using soap and water
If the above-mentioned idea fails, then you should apply the soap and water method. Even some people suggest mixing glycerine as they believe it helps to retain the effectiveness of the bubbles that you will create. Besides some people are use detergent to lower the water’s surface tension which allows lasting the bubbles for a long.
But there is a downside of using glycerine as it may cause hand skin. The process begins with mixing the dish soap and water and starting lathering up the bounce house.
Same as patching a car tire; you should notice bubbles forming from where the air is trying to escape. Besides, you should get the clue from visual inspection as to where the soap and water have to add.
If you have done, let’s hose off the bouncy castle or allow the kids to play. It will help dry out the bounce house over time, or you can put it unused in the sun for a while.
On the other hand, if you want to use glycerin or corn syrup, wait for a while to give a vigorous stir to get it equally mixed with the dish soap and water. It will help you clean the bounce house properly.
How to Patch a Hole or Leak
There is two effective and most popular way to patch up a kid’s bouncer. The first one is adding tape. Thought it’s an instant solution but don’t survive for long especially while the kids start jumping or bouncing.
The other is Vinyl Patching Process which is effective and recommended by experts. In this section, we will discuss the second process step by step so anyone can repair the hole or leak of the bounce house simply and easily.
The Vinyl Patching Process
However, it takes some time but Patching up a vinyl bouncer is a pretty straightforward process. Even half of the time often spent just finding the hole or leak. To apply the process you will need a Vinyl Repair Kit.
Step 1: Clean the area
Clean all the particles and debris from the general area of the leak. You can use the dish soap to clean the area but don’t forget to dry it off. The more you will clean; it will help establish the highest adhesion of the patch.
Step 2: Cut the patch
Take the measurement twice and cut once. Besides, make sure that you don’t leave any sharp edges as it tends to catch and get ripped off easily. At the same time, check that you leave 1-2 inches of space beyond the hole to attach the vinyl properly on the moon bounce.
Step 3: Apply the glue
Now apply the glue to the patch and the inflatable to ensure the strongest bond between the two. It will be better if you can attach the patch to the inside of the bouncer as it will help the air work for the patch.
Coat the surfaces tightly and perfectly. If the cement gets tacky, make the joint.
Step 4: Firmly apply the patch to the vinyl
Now ensure that the patch is in a flat position and remains without stuck with other pieces. Then you can do two things. You can sit holding the pieces for several minutes or get aid from a heavy object to do the job of maintaining enough pressure on the patch site.
Step 5: Make sure all edges form a seal
If any part sticks up, it won’t properly bond. So you can add more glue or press down upon the patched leak by using a heavier object.
Step 6: Test out the repair
Then connect the blower and fire up the bouncer. Check that the part previously wasn’t accurately inflating but now filling up with air.
Final words
So how to repair a bounce house, hope now you get it and most importantly find all the needed information to make the job done properly. Repairing a bounce house is not just all about making the bounce house prepare for longer use but it brings the smiles, excitement, and happiness back to the kid’s face which is Invaluable.
